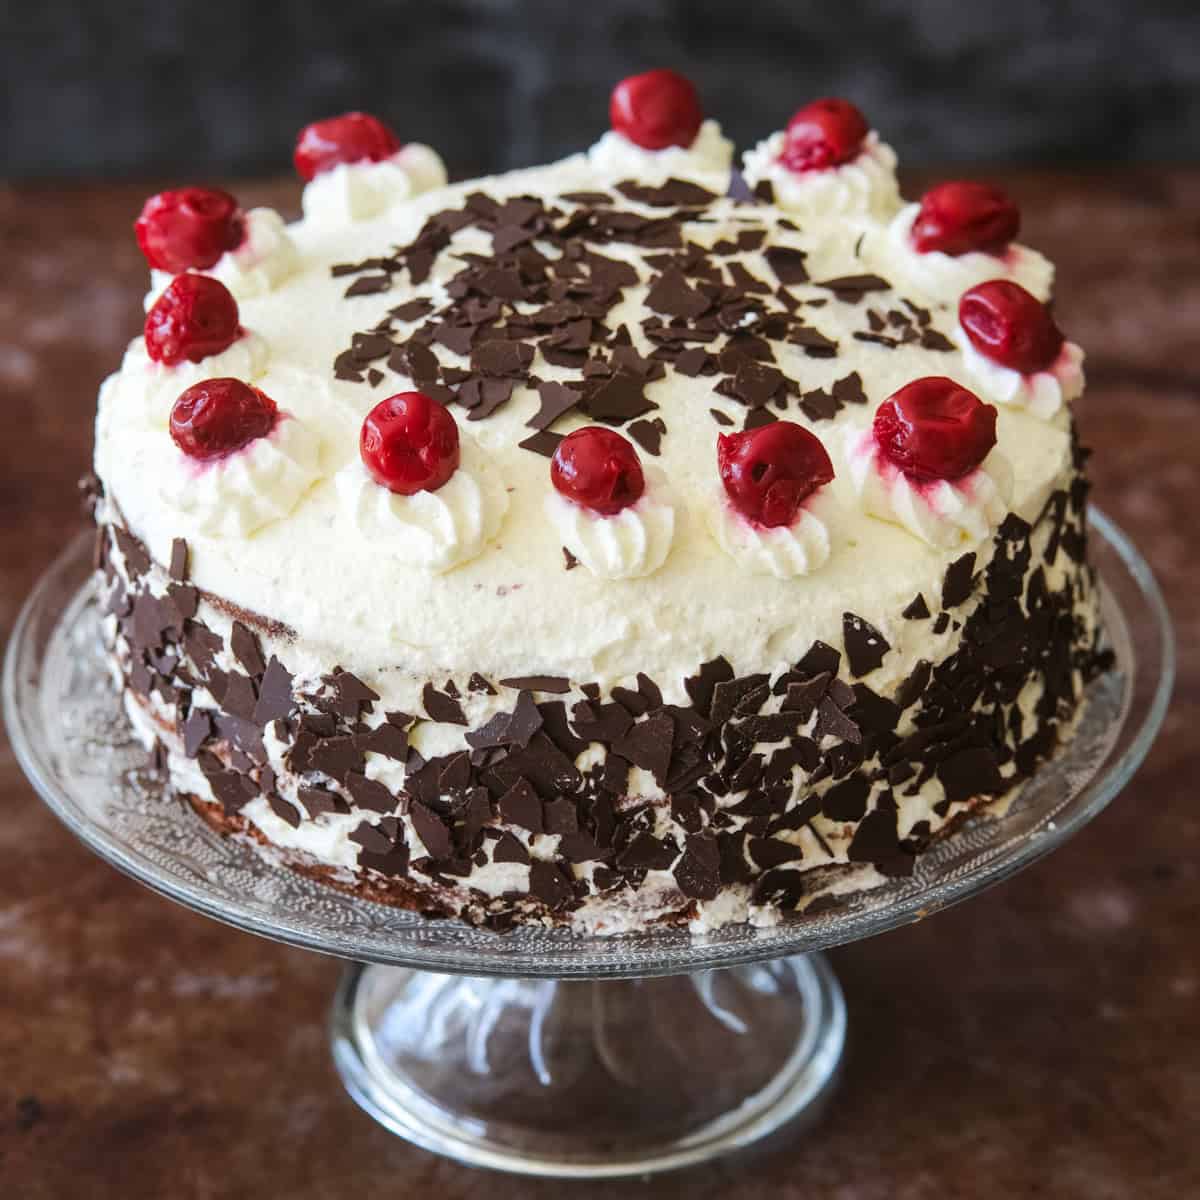
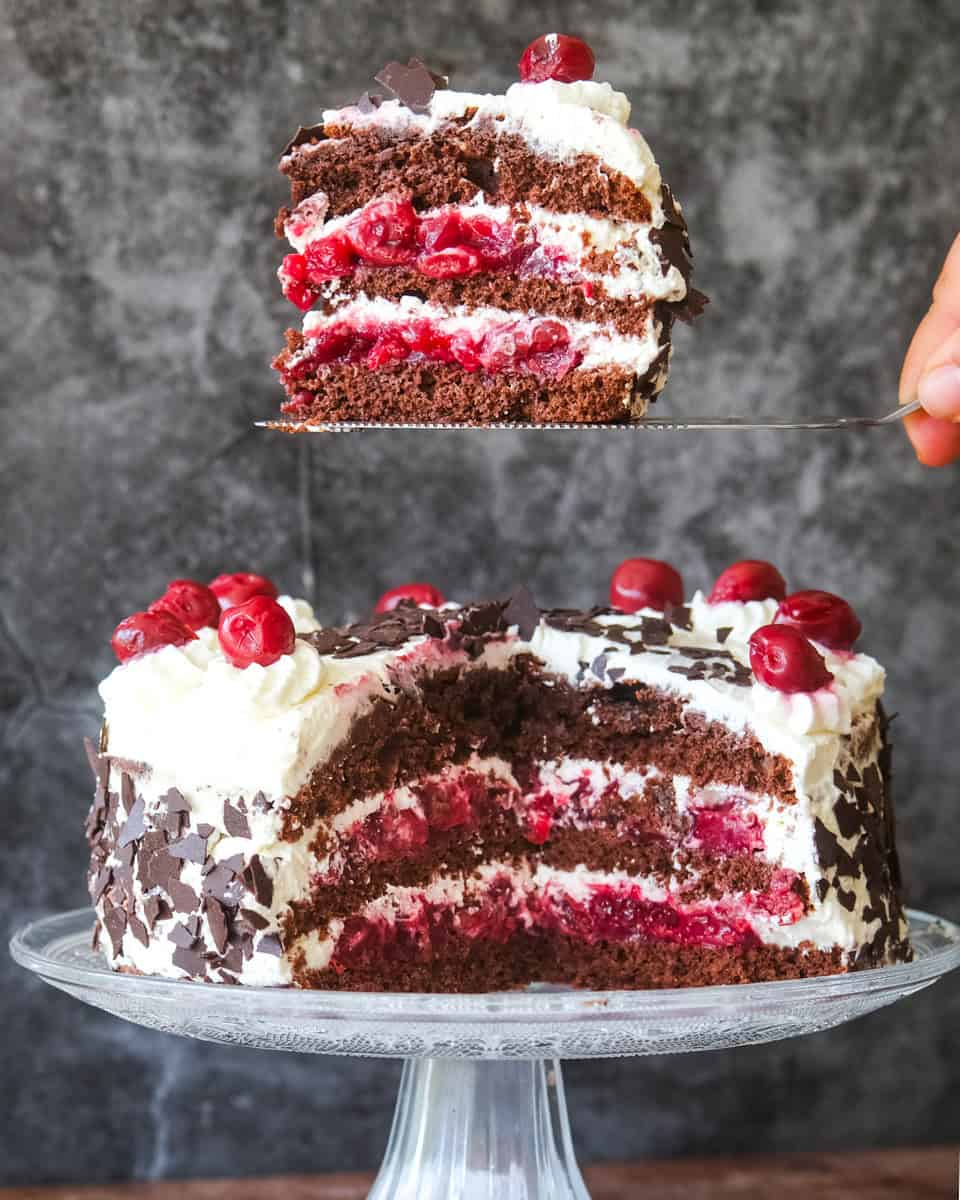
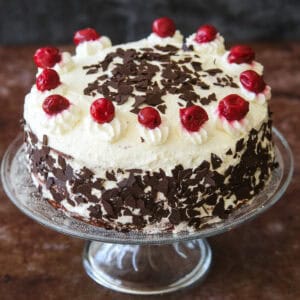
If there is one cake that every German baker is secretly a little afraid of, it is this one. The Schwarzwälder Kirschtorte, known the world over as Black Forest Cake or Black Forest Gateau, is Germany's most iconic cake, and it comes with a lot of expectation. A moist chocolate sponge soaked in Kirschwasser, layered with gloriously tart cherries and a light vanilla whipped cream. It is the showpiece of German baking, and for good reason.
I'll be honest: it took me years to finally publish this recipe. I was in awe, a little intimidated so more than a little hesitant to put my version out into the world. But here's what I found out after finally making it: you really don't need to be scared of it. It's not as quick and easy as a Marble Cake, but it's not rocket science either, and it is absolutely achievable for home cooks like you and me.
Jump to:
- A German Classic With a Surprisingly Disputed History
- Ingredients an Authentic Schwarzwälder Kirschtorte
- How to Make It Black Forest Cake: Step-by-Step
- Tips, Tricks, and What to Do When Things Go Wrong
- Storing Your Cake (and What to Do With Leftovers if there are any)
- Want to Skip the Kirsch? Here's How
- Yes, You Can Make It Ahead, and Here's Why You Should
- Storing Your Cake
- Have you made this recipe?
- Recipe
A German Classic With a Surprisingly Disputed History
Here is something that might surprise you: the Schwarzwälder Kirschtorte, which translates literally as Black Forest Cherry Cake, is not technically from the Black Forest at all. Here are the three most common theories about how it got its name:
- It's named after the Kirschwasser. The cherry brandy that is the soul of this recipe has been produced in the Black Forest region of Germany for centuries and carries a legally protected geographical name, much like champagne. Most food historians consider this the most likely explanation.
- It's named after the forest itself. The dark chocolate shavings on the outside are said to evoke the deep, dark trees of the Schwarzwald.
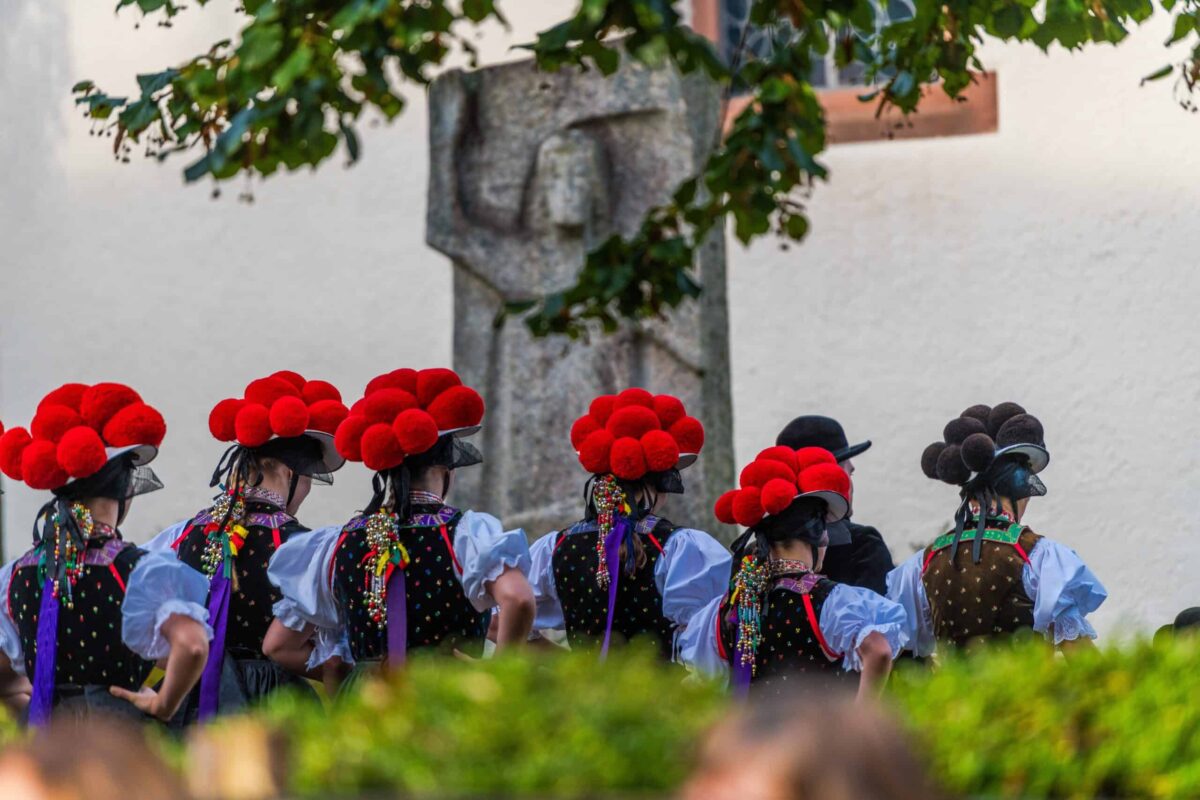
- It's named after the Bollenhut. This is my personal favourite. The red, white, and black colour scheme of the cake mirrors the iconic headdress worn by women in the Black Forest region. Those large red pompoms on a black hat look uncannily like cherries on a chocolate cake. Once you see it, you can't unsee it.
Even the history of Black Forest Cake is disputed. A Swabian pastry chef named Josef Keller claimed to have created an early version in 1915, while a Tübingen city archivist points to a different pastry master as the true inventor in 1930. Today, it is the most famous German cake in the world, and now it is finally on my blog.
Ingredients an Authentic Schwarzwälder Kirschtorte
For the detailed instructions and exact measurements, please jump to the printable recipe card
The Chocolate Sponge
The sponge for a traditional Black Forest Cake is a German Biskuit, lighter and more delicate than a regular chocolate cake. You need eggs (separated), granulated sugar, a little hot water, all-purpose flour, cornstarch, unsweetened cocoa (affiliate link) powder, and baking powder (affiliate link). No butter, no oil. The eggs do all the heavy lifting, and the cornstarch is what gives the Biskuit its characteristically light, tender crumb.
The Cherry Filling
The cherry filling is what sets a real Black Forest cherry gateau apart from the pale imitations you find in most supermarkets. Look for Morello cherries or cherries labelled "sour cherries in light syrup" at your grocery store, supermarket, or online. You also need the juice from the jar, a little cornstarch to thicken it into a cherry compote, sugar, and vanilla extract (affiliate link). Frozen sour cherries work well too - thaw completely and use the liquid they release in place of the jar juice.
 Buy Now →
 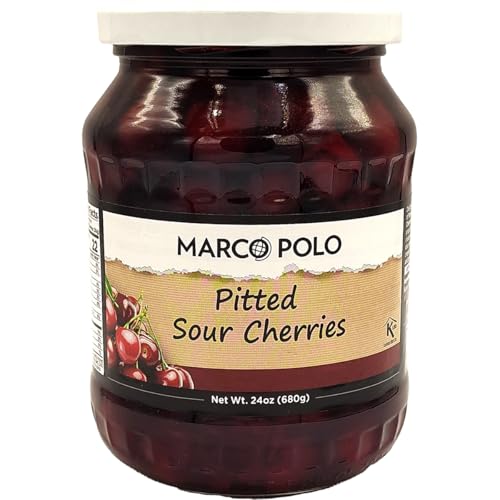 Buy Now →
 (affiliate link)
The Whipped Cream
Unlike many celebration cakes, Black Forest Cake is finished with a light, barely-sweetened whipped cream, not frosting. You need heavy whipping cream, a little powdered sugar, and vanilla extract (affiliate link). In Germany, you would traditionally stabilise the cream with Sahnesteif, but powdered sugar does the job perfectly well here. For extra stability on a warm day or if making ahead, add a little bit of dissolved gelatine (or vegetarian alternative) as you whip.
How to Make It Black Forest Cake: Step-by-Step
Step 1 - Make the Chocolate Sponge
Beat the egg yolks with hot water and sugar until very pale, thick, and creamy, around 4 to 5 minutes with an electric mixer. Sift the dry ingredients over the top, whip your egg whites to stiff peaks separately, then fold everything together gently with a spatula. Pour straight into your springform pan and bake immediately.
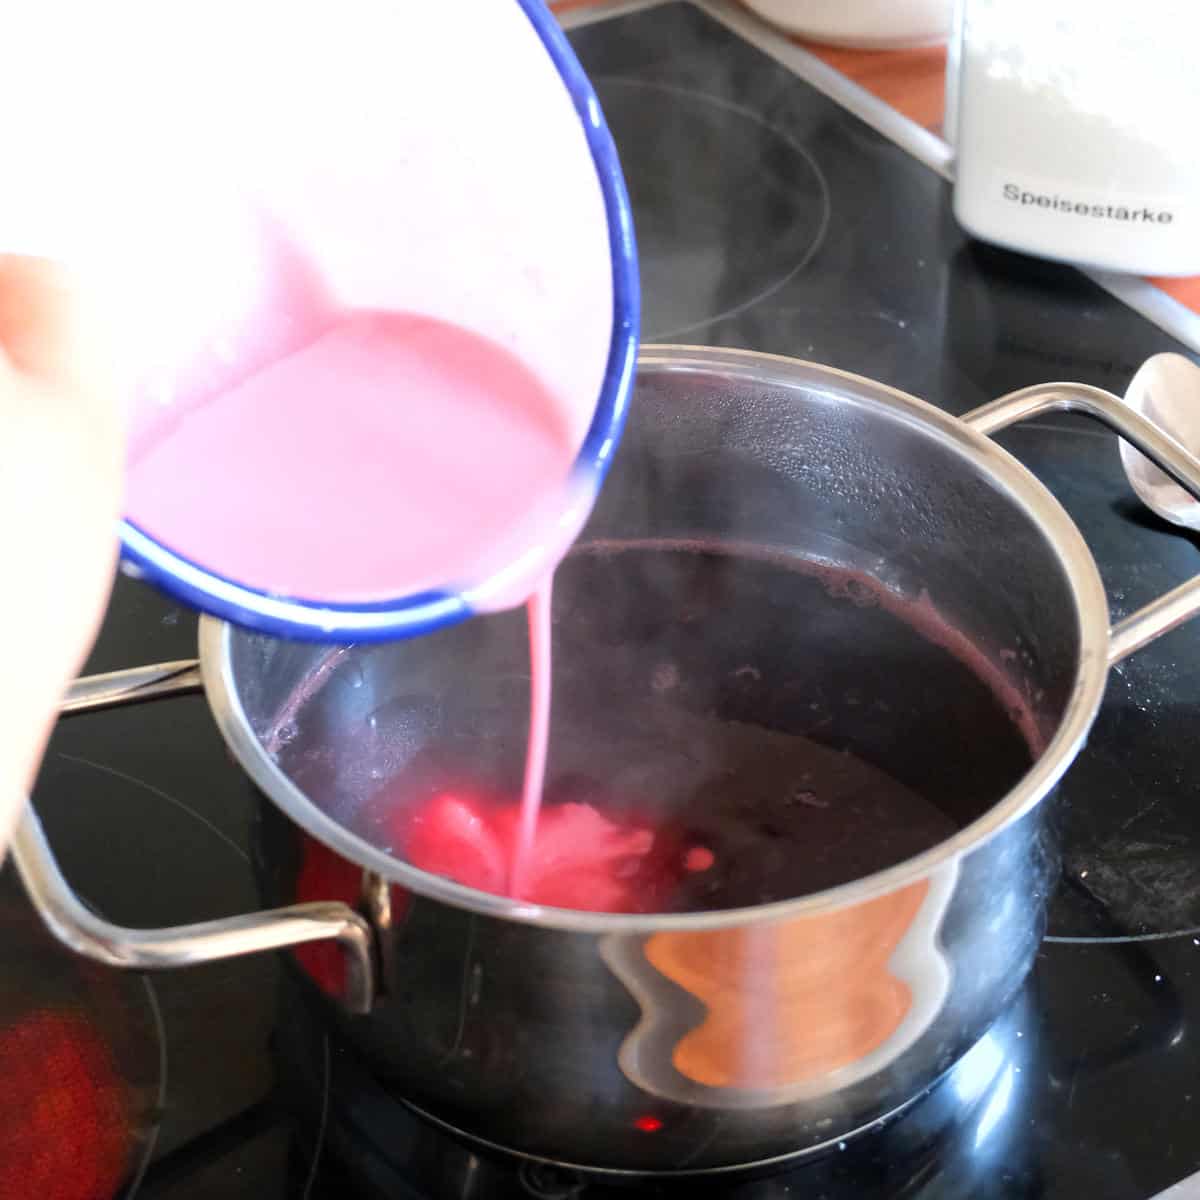
Step 2 - Make the Cherry Compote
Drain your cherries and reserve the juice, topping it up with water to reach 2 cups. Mix a few tablespoons with cornstarch, sugar, and vanilla to make a smooth paste, bring the rest to a boil, then whisk the paste in. Cook until thickened, stir in the cherries, and cool completely before using
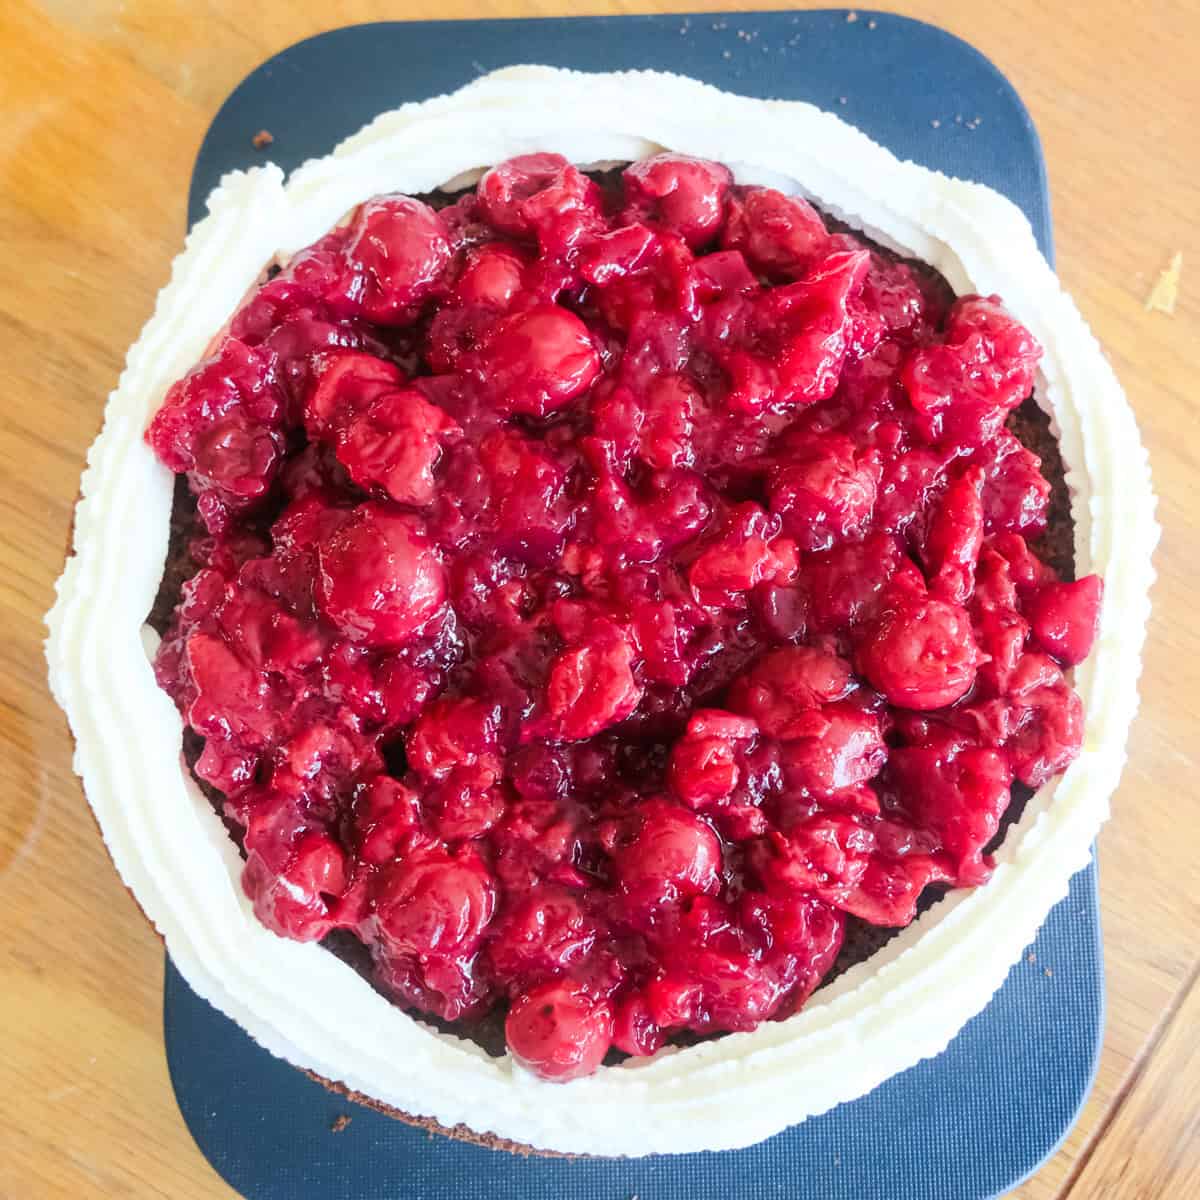
Step 3 - Slice and Fill
Once the sponge is completely cool, slice it into three even layers. Pipe a ring of whipped cream around the edge of the bottom layer to act as a border, then spread half the cherry filling inside. Repeat with the second layer and the remaining filling.
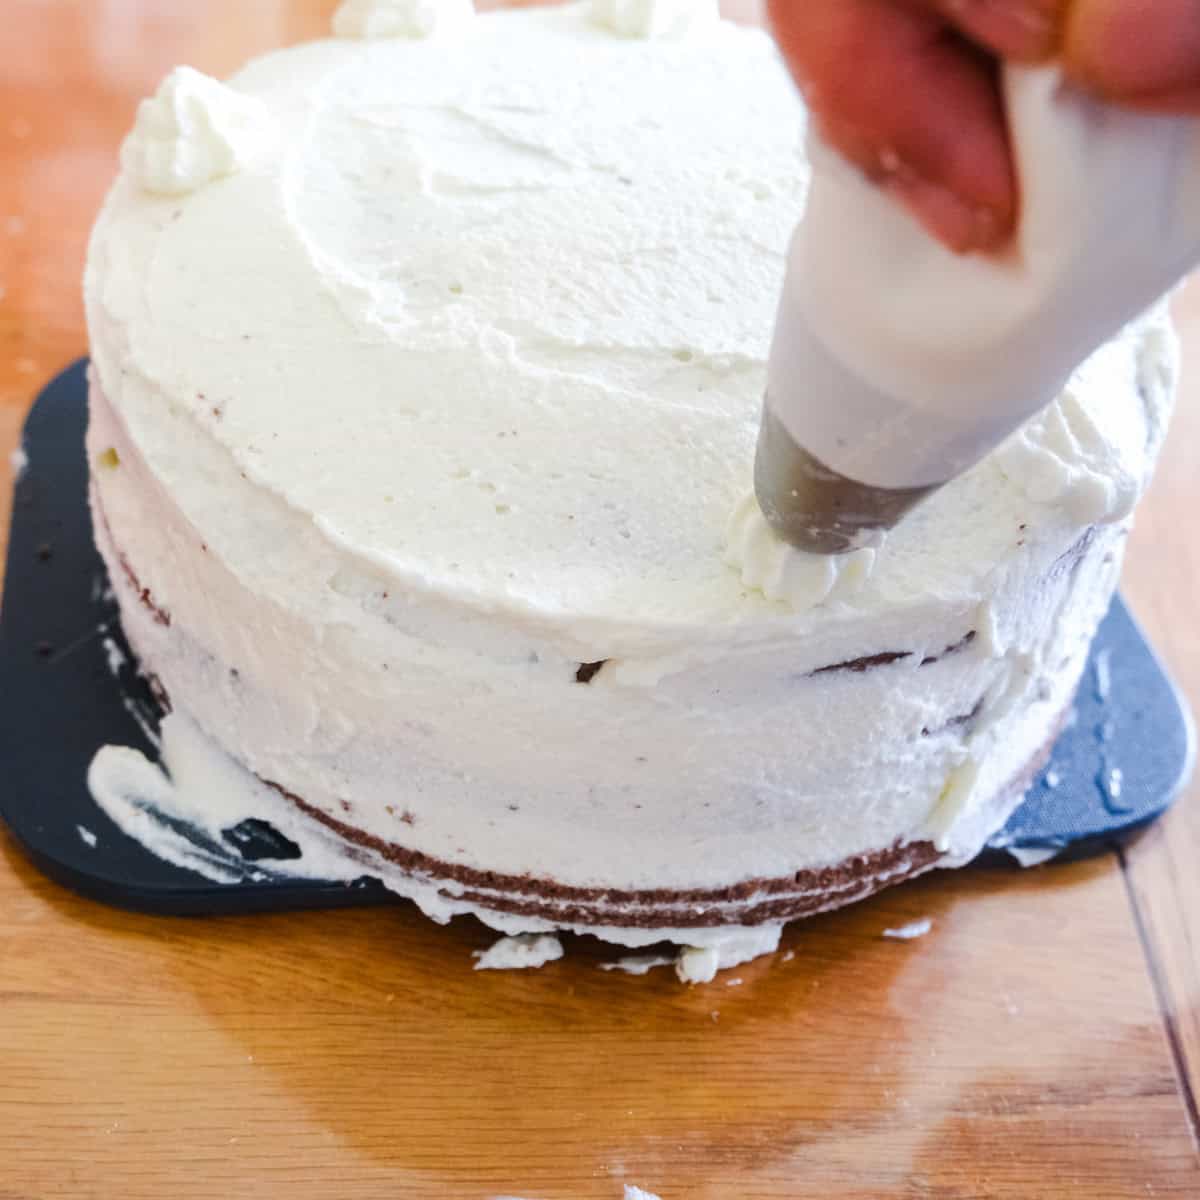
Step 4 - Decorate and Cover
Place the third sponge layer on top and cover the whole cake generously with whipped cream, top and sides. Pipe cream rosettes on top, place a cherry on each one, and finish with a scatter of chocolate shavings all over. Refrigerate for at least 2 hours before slicing.
Tips, Tricks, and What to Do When Things Go Wrong
- Beat the eggs properly. The egg and sugar mixture needs a full 4 to 5 minutes of mixing until very pale, thick, and almost white. Rush this and the sponge will be dense and flat.
- Don't skip the hot water. Adding hot water to the egg yolks before beating is a classic German bakery trick that creates extra volume. It sounds odd, but it makes a real difference.
- Fold, don't stir. Once you add the dry ingredients and egg whites, fold with slow, deliberate strokes. Overmixing knocks out the air you just spent 5 minutes building up.
- Only grease the bottom of the pan. The batter needs to grip the ungreased sides as it rises to climb evenly and avoid a domed top.
Troubleshooting:
- My sponge sank or is dense. The eggs were not beaten long enough, the batter was overmixed, or the oven door was opened too early. Take your time on the beating step, fold gently, and resist opening the oven.
- My cream is not holding its shape. Make sure the cream is very cold before whipping. Stabilise with a little gelatine if it is a warm day or you are making the cake ahead.
- My layers are sliding or the filling is too runny. Don't skip the cream border around each layer - it keeps everything in place. If the cherry filling is loose, then perhaps it needs another minute of boiling after the cornstarch has gone in ( or an extra tablespoon cornstarch).
Want to save this recipe?
Storing Your Cake (and What to Do With Leftovers if there are any)
Because of the fresh whipped cream, Black Forest Cake needs to live in the fridge. Cover it loosely, and it will keep well for up to 3 days. You can freeze the sponge layers before assembly, wrapped individually in plastic wrap, for up to 3 months. The assembled cake with cream and cherries does not freeze well.
Want to Skip the Kirsch? Here's How
No Kirsch? No problem. The simplest swap is tart cherry juice or even orange juice- use it to soak the sponge layers and add a splash to the cherry compote. You can also mix the cherry juice with a little rum for some boozy flavour. Or just leave out the kirschwasser without replacing it. That works just as well.
Yes, You Can Make It Ahead, and Here's Why You Should
This cake genuinely improves with time. Bake the sponge up to 2 days ahead, wrapped tightly in plastic wrap at room temperature. Make the cherry compote up to 3 days ahead. Assemble the day before serving and refrigerate overnight for the best flavor and cleanest slices. Got leftovers? Turn them into a Black Forest Sundae - it comes together in minutes.
Storing Your Cake
Black Forest Cake keeps in the fridge, loosely covered, for up to 3 days. You can freeze the sponge layers individually for up to 3 months before assembly, but the assembled cake does not freeze well.
Have you made this recipe?

I'd love to hear how it turned out! Leave a rating and comment below.
You'll help fellow readers enjoy it too and help me spread the word about German cuisine. - Marita x
Recipe
Traditional German Black Forest Cake Recipe
Equipment
- 1 star tip nozzle
Ingredients
For the Sponge Base
- 4 eggs separated
- 3.5 tablespoon hot water
- 125 g (1 cup) all-pupose flour UK plain flour, Germany type 405
- 30 g (¼ cup) cornstarch
- 30 g (6 tablespoon) unsweetened cocoa (affiliate link) powder
- 1 teaspoon baking powder
For the Cherry Filling
- 1 jar cherries drained (juice reserved) - see notes if using frozen or fresh cherries
- 500 ml (2 cups) cherry juice the jar, topped up with water to make 2 cups / 500ml
- 4 tablespoon corn starch
- 4 tablespoon granulated sugar
- 1 teaspoon vanilla extract
For the Whipped Cream
- 500 ml (2 cups) whipping cream or heavy cream, at least 30% fat content - best whipped when chilled - see note if you want to use gelatine (or vegetarian alternative) to further stabilise the cream
- 40 gr (⅓ cup) powdered sugar
- 1 teaspoon vanilla extract
To assemble
- 50 ml (4 tablespoon) Kirschwasser German cherry schnapps - see notes for alternatives
- 30 gr (⅛ cup) chocolate shavings see notes how to make your own chocolate shavings.
Instructions
Make the Base (up to two days in advance)
- In a large bowl, beat the egg yolks with the hot water and sugar until the mixture is very pale, thick, and creamy - you should no longer see any sugar crystals. This takes a good 4-5 minutes with an electric mixer.4 eggs, 3.5 tbsp hot water, 125 g all-pupose flour
- In a separate bowl, whisk together the flour, cornstarch, baking powder (affiliate link), and cocoa powder. Sift this mixture over the egg yolk cream - don't stir yet!30 g cornstarch, 30 g unsweetened cocoa (affiliate link) powder, 1 tsp baking powder (affiliate link)
- In a clean, grease-free bowl, beat the egg whites to stiff peaks. They should hold their shape when you lift the beaters.
- Add the egg whites on top of the dry ingredients and egg yolk mixture, then gently fold everything together using a large spatula. Work carefully and don't overmix - you want to keep as much air in there as possible. Move quickly to the next step!
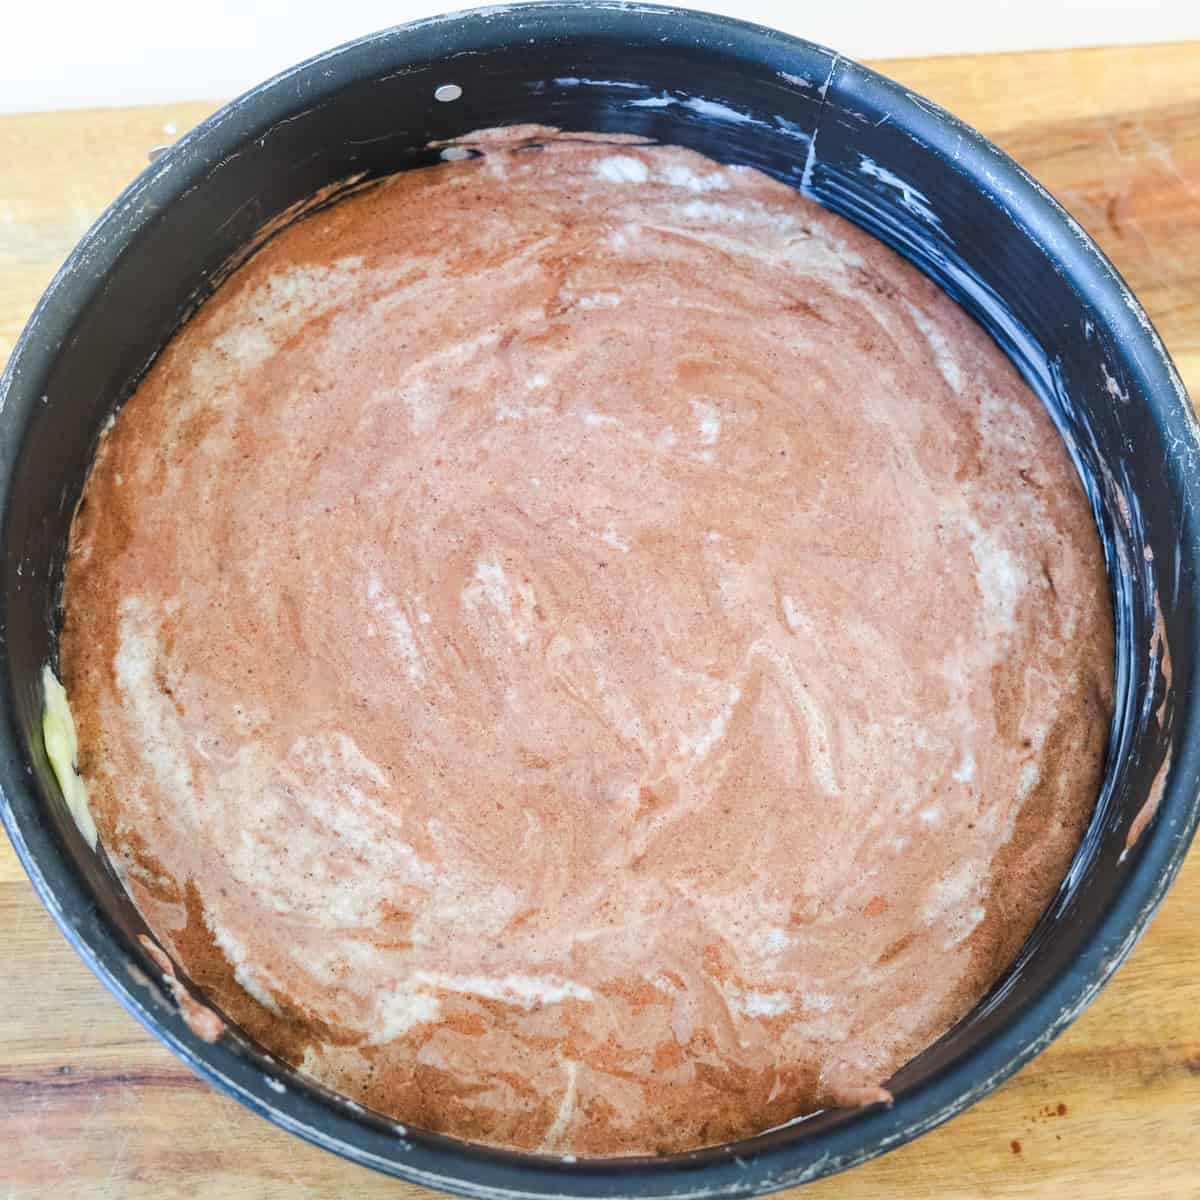
- Pour the batter immediately into a 20cm (8-inch) springform pan - grease and flour the bottom only, NOT the sides. Bake at 340°F (170°C) for 30-35 minutes, or until a toothpick inserted in the centre comes out clean. Let the sponge cool in the pan for 10 minutes, then release the springform and transfer to a wire rack. Cool completely before slicing into layers. Tip: Is easier to slice the next day!
Make the Cherry Filling
- Measure out the cherry juice, topping up with water if needed to reach 2 cups (500ml). Remove 6 tablespoons of the liquid and mix with the cornstarch, sugar, and vanilla extract (affiliate link) until you have a smooth, lump-free paste.1 jar cherries, 4 tbsp corn starch , 4 tbsp granulated sugar , 1 tsp vanilla extract (affiliate link) , 500 ml cherry juice
- Pour the remaining cherry juice into a small saucepan and bring to a boil over medium heat. Once boiling, remove from the heat and whisk in the cornstarch paste, stirring continuously. Return to the heat and boil for 1-2 minutes, whisking the whole time, until the mixture thickens to a gel-like consistency.
- Add the drained cherries to the thickened sauce and stir gently to coat. Warm through for a minute or two, then remove from the heat and set aside to cool completely. The filling will thicken further as it cools.
Prepare the Whipped Cream
- Whip the chilled heavy cream with the powdered sugar and vanilla extract (affiliate link) until stiff peaks form. Be careful not to overwhip - stop as soon as it holds its shape.
Assemble
- Slice the cooled sponge horizontally into 3 even layers using a cake leveler (affiliate link) or the cross-string method (loop a long piece of string around the sponge, cross the ends over each other, and pull tight). Brush each layer generously with Kirschwasser and let it soak in for a few minutes before assembling.50 ml Kirschwasser
- Place the bottom sponge layer on a cake plate or stand. Using a piping bag (affiliate link), pipe a ring of whipped cream around the edge to act as a border. Spread half of the cherry filling inside the cream border, then cover with about a quarter of the remaining whipped cream.
- Place the second sponge layer on top and repeat: pipe a cream border, fill with the remaining cherry filling, and spread another quarter of the cream over the top.
- Place the third sponge layer on top. Spread the remaining whipped cream over the top and sides of the cake. Use a piping bag (affiliate link) to pipe decorative cream rosettes on top, then place a cherry on each rosette. Finish with a generous scatter of chocolate shavings over the top and sides.30 gr chocolate shavings
- Refrigerate the assembled cake for at least 1-2 hours before slicing and serving. This helps everything set and gives you cleaner, more beautiful slices.
Notes
Kirschwasser — and what to use instead: Traditional Black Forest Cake is made with Kirschwasser, a German cherry schnapps. Use about 50ml and brush it generously onto each sponge layer before assembling — it adds incredible depth of flavour and keeps the sponge moist. No Kirschwasser? No problem. The simplest swap is tart cherry juice or orange juice to soak the sponge layers, with a splash added to the cherry filling. You can also mix the cherry juice with a little rum for a boozy flavour. Or just leave it out entirely — it works too.
How to stabilise your whipped cream: In Germany, bakers traditionally use Sahnesteif (a cream stabiliser) to keep whipped cream firm. Powdered sugar works perfectly well here as a light stabiliser. For extra stability on a warm day or if making ahead, add dissolved gelatine as you whip: soften 6 gelatine sheets (or 1 packet / 7g powdered gelatine) in cold water, dissolve gently over low heat, let it cool slightly, then pour it in a thin stream into the cream as you whip. How to make your own chocolate shavings:Chocolate shavings are one of the easiest ways to make a cake or dessert look instantly impressive. To make chunkier shavings, simply run a regular vegetable peeler along the edge of a chocolate bar. For finer, more delicate curls, a mandoline or box grater works best. Either way, the key is to make sure your chocolate is well chilled beforehand — cold chocolate shaves much more cleanly and is less likely to melt and smear as you work.
Want to save this recipe?
Nutrition
 Made this recipe?Drop a ⭐ rating and a quick comment below. I personally read and reply to every review!

Leave a Reply